The Nikon D5000 instruction manual is your comprehensive guide to understanding and maximizing the camera’s features․ Access it online or via the Nikon Manual Viewer app for detailed insights into autofocus, shooting modes, and customization options to unlock your camera’s full potential․
1;1 Overview of the Nikon D5000 Camera
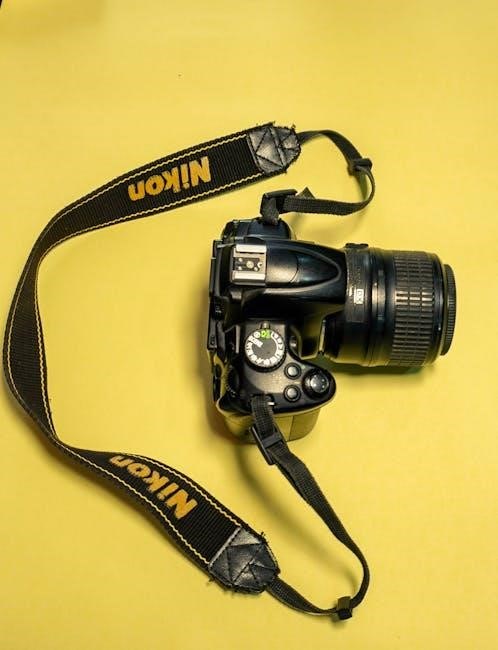
The Nikon D5000 is a powerful entry-level DSLR camera designed for photographers seeking versatility and high-quality imaging․ Equipped with a 12․3-megapixel CMOS sensor, it delivers sharp images and excellent low-light performance․ The camera features Live View mode, HD movie recording, and a vari-angle LCD screen for flexible shooting․ Its intuitive interface and advanced shooting modes make it ideal for both beginners and intermediate photographers․ The D5000 supports a wide range of Nikon lenses and accessories, offering endless creative possibilities․ This camera is a great tool for capturing life’s moments with precision and style․
1․2 Key Features of the Nikon D5000
The Nikon D5000 boasts a 12․3-megapixel CMOS sensor, delivering crisp images and excellent low-light performance․ It features Live View mode for precise composition and HD movie recording for capturing dynamic moments․ The vari-angle LCD screen offers flexibility in shooting from various angles․ With Scene Modes and advanced autofocus, it simplifies photography for beginners while offering manual controls for creative freedom․ Compatible with a wide range of Nikon lenses, the D5000 supports external flashes and accessories, enhancing its versatility for diverse photography needs․
1․3 Importance of Reading the Instruction Manual
Reading the Nikon D5000 instruction manual is essential for understanding its advanced features, troubleshooting common issues, and optimizing performance․ The manual provides detailed insights into autofocus settings, shooting modes, and customization options, helping users master the camera’s capabilities․ It also guides users through firmware updates, maintenance, and accessory compatibility, ensuring they get the most out of their device․ Whether you’re a novice or an experienced photographer, the manual serves as a invaluable resource for unlocking the full potential of the Nikon D5000․

Getting Started with the Nikon D5000
Getting started with the Nikon D5000 involves unpacking, initial inspection, and basic setup․ The manual guides you through charging the battery, inserting the memory card, and navigating initial settings to ensure a smooth start with your camera․
2․1 Unpacking and Initial Inspection
When unpacking your Nikon D5000, carefully remove the camera, lens, battery, charger, straps, and manual․ Inspect the camera body and lens for any visible damage or defects․ Check for all included accessories to ensure nothing is missing․ Gently wipe the camera and lens with a soft cloth to remove any packaging materials or fingerprints․ Familiarize yourself with the camera’s exterior, locating key controls like the mode dial, shutter button, and memory card slot․ This step ensures your camera is in perfect condition and ready for setup․
2․2 Identifying Camera Parts and Controls
Familiarize yourself with the Nikon D5000’s key components․ The mode dial on top allows you to select shooting modes like Auto, P, S, A, and M․ The shutter button is located on the right grip, alongside the aperture/exposure compensation button․ The LCD screen on the rear displays settings and images․ The mult-selector helps navigate menus, while the live view button activates video and live view modes․ The lens release button is on the front, and the memory card slot is on the right side․ Understanding these controls is essential for efficient operation․
2․3 Charging the Battery and Inserting the Memory Card
First, charge the Nikon D5000’s battery using the provided MH-24 charger․ Insert the battery into the camera by opening the compartment on the bottom․ Align the battery contacts with the camera’s terminals and secure it․ Next, insert a memory card into the card slot on the right side․ Use a compatible SD or SDHC card and ensure it clicks into place․ Always use a fully charged battery and a formatted memory card for optimal performance․ This ensures you’re ready to start shooting․
2․4 Basic Camera Setup and Initial Settings
Turn on the camera by pressing the shutter-release button․ Navigate to the setup menu to configure basic settings․ Set your language, date, and time․ Select the correct time zone and enable daylight saving if needed․ Format the memory card using the setup menu to ensure proper camera functionality․ Set the image quality (e․g․, JPEG or RAW) and image size based on your needs․ Choose the auto mode or other modes like P, S, A, or M for more control․ Finally, adjust the white balance settings to match your lighting conditions (e․g․, Auto, Daylight, or Cloudy)․

Camera Modes and Shooting Options
Explore various shooting modes like Auto, Scene, Program (P), Shutter-Priority (S), Aperture-Priority (A), and Manual (M) for creative control․ Access Live View and Movie modes for versatile photography and videography․
3․1 Understanding Auto Mode and Scene Modes
The Nikon D5000 offers Auto Mode for effortless shooting, automatically adjusting aperture, shutter speed, and ISO for balanced results․ Scene Modes provide optimized settings for specific scenarios like Portrait, Landscape, Sports, and Night Portrait, enhancing image quality without manual adjustments․ Access these modes via the mode dial or menu for tailored photography experiences․
3․2 Exploring Program Mode (P)
Program Mode (P) on the Nikon D5000 offers a balance between simplicity and control․ It automatically sets aperture and shutter speed but allows adjustments to ISO, exposure compensation, and flash․ This mode is ideal for photographers who want more flexibility than Auto Mode without the complexity of manual settings․ Access Program Mode via the mode dial, then use the command dial to tweak settings for personalized results while maintaining ease of use․
3․3 Mastering Shutter-Priority Mode (S)
Shutter-Priority Mode (S) allows you to set the shutter speed manually, giving you control over motion capture and creative effects․ The camera automatically adjusts the aperture to maintain proper exposure․ Access this mode via the mode dial․ Use faster shutter speeds to freeze action or slower speeds for artistic blur․ Adjust ISO sensitivity as needed for optimal results․ This mode is ideal for capturing dynamic scenes, such as sports or moving subjects, while still benefiting from automatic aperture adjustments․
3․4 Using Aperture-Priority Mode (A)
Aperture-Priority Mode (A) lets you manually set the aperture while the camera automatically adjusts the shutter speed for proper exposure․ This mode is excellent for controlling depth of field, allowing you to isolate subjects or ensure everything is sharp․ Use a wide aperture (low f-number) for a shallow focus, ideal for portraits, or a narrow aperture (high f-number) for landscapes․ Adjust ISO sensitivity as needed to achieve the desired effect․ This mode offers creative control over depth of field while simplifying exposure management․
3․5 Manual Mode (M) for Full Control
Manual Mode (M) offers complete control over exposure settings, allowing you to set both aperture and shutter speed manually․ This mode is ideal for experienced photographers who want precise control over their shots․ Adjust the aperture using the lens aperture ring and the shutter speed via the command dial․ ISO sensitivity can also be manually set to suit lighting conditions․ Use the exposure meter as a guide to ensure proper exposure․ Manual Mode is perfect for achieving specific effects, such as freezing motion or creating motion blur, giving you ultimate creative freedom․
3․6 Live View Mode and Movie Recording
Live View Mode on the Nikon D5000 allows you to preview your shots on the LCD screen, helping you compose images accurately․ Press the Lv button to activate it, and adjust focus using the AF button․ For movie recording, switch to Live View and press the record button․ The D5000 captures HD video at 24fps, ideal for cinematic results․ Use a tripod for stability and consider external microphones for better audio․ Movie recording offers creative possibilities, making it a versatile feature for capturing dynamic content with precision and ease․
Focusing and Metering
Focusing ensures sharp images by adjusting lens position, while metering measures light for accurate exposure․ Both are essential for capturing well-balanced and detailed photos․
4․1 Autofocus Modes and Settings
The Nikon D5000 offers advanced autofocus modes to suit different shooting scenarios․ AF-A mode automatically selects between single and continuous AF․ AF-C mode is ideal for moving subjects, while AF-S is best for stationary ones․ The camera also features AF-area modes, including single-point, dynamic-area, and auto-area AF․ These settings allow precise control over focus acquisition, ensuring sharp images in various conditions․ Adjusting these settings according to the subject’s movement and composition is key to achieving professional results․ Mastering autofocus modes and settings enhances your ability to capture high-quality images consistently․
4․2 Manual Focus and Focus Lock
For precise control, the Nikon D5000 allows manual focusing using the lens focus ring․ This is useful for creative or tricky focusing situations․ Focus lock ensures focus remains on a subject while recomposing․ Press the AE-L/AF-L button to lock focus, then adjust framing․ This feature is especially handy for off-center compositions or when using autofocus modes․ Manual focus and focus lock provide flexibility, enabling photographers to achieve accurate results in challenging conditions․ Proper use enhances image sharpness and compositional freedom․ Practice these techniques to improve your photography skills effectively․ Mastering manual focus and focus lock ensures better control over your images․
4․3 Understanding Metering Modes
The Nikon D5000 offers three metering modes to accurately measure light: Matrix, Center-Weighted, and Spot․ Matrix Metering analyzes the entire scene for balanced exposure, ideal for most situations․ Center-Weighted prioritizes light from the center, suitable for portraits․ Spot Metering measures light from a small area, perfect for high-contrast scenes․ Adjusting these modes via the Shooting Menu or a dedicated button ensures optimal exposure control․ Understanding metering modes enhances your ability to capture images with precise lighting, making it a crucial skill for photographers seeking creative control over their shots․ Proper use of these modes ensures well-exposed images in various lighting conditions, allowing for greater flexibility and artistic expression․ Mastering metering modes is essential for achieving professional-looking results with the Nikon D5000, helping you adapt to different environments and subjects effortlessly․ This knowledge empowers you to make informed decisions, leading to improved photography outcomes․ By familiarizing yourself with these modes, you can better manage lighting challenges and produce stunning images consistently․ Metering modes are a fundamental tool in photography, and their effective use is key to unlocking the full potential of your camera․
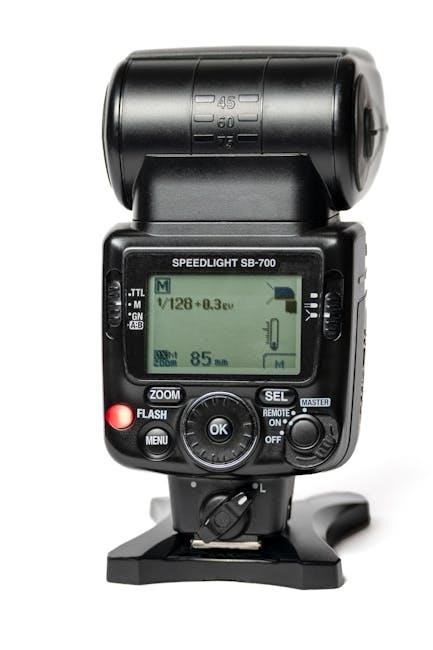
4․4 Using the Built-In Flash and External Flash
The Nikon D5000 features a built-in flash for convenient lighting in low-light conditions․ Activate it via the flash button on the camera․ For more versatility, external flashes like Nikon Speedlights can be mounted on the hot shoe․ These offer adjustable power, bounce capabilities, and wireless operation․ Use the built-in flash for casual shots and external flashes for professional results․ Adjust flash settings in the Shooting Menu to control output and sync modes․ Proper flash usage enhances illumination and reduces shadows, ensuring well-lit images in various scenarios․ Experiment with flash modes like TTL and manual for creative control․ This feature is essential for achieving balanced lighting in your photography; Using external flashes also expands your creative options, allowing for off-camera lighting setups․ Always ensure the flash is compatible with the D5000 for optimal performance․ Mastering flash techniques can significantly improve your photography skills and image quality․ Understanding flash synchronization and metering is key to capturing stunning, well-illuminated photos․ The built-in and external flashes are powerful tools for enhancing your photographic capabilities with the Nikon D5000․ By leveraging these features, you can overcome challenging lighting conditions and produce professional-grade images consistently․ Proper use of flash ensures your subjects are well-lit and your creativity is unleashed․ The Nikon D5000’s flash system is designed to provide flexibility and precision, making it an invaluable asset for photographers of all levels․ Whether using the built-in flash or an external unit, you can achieve the lighting you need to bring your vision to life․ This section will guide you through the essentials of flash photography, helping you make the most of your Nikon D5000’s capabilities․ With practice, you’ll master the art of flash photography and take your images to the next level․ The built-in and external flashes are indispensable tools for any photographer looking to enhance their craft․
Customizing Your Shooting Experience
Customizing your shooting experience with the Nikon D5000 allows you to tailor settings to your preferences, enhancing creativity and control over your photography․
5․1 Adjusting ISO Sensitivity
Adjusting ISO sensitivity on the Nikon D5000 allows you to control the camera’s light sensitivity, ensuring optimal image quality in various lighting conditions․ The default ISO range is 200–3200, but it can be expanded to 100–6400 for low-light situations․ Lower ISO settings (e․g․, ISO 200) are ideal for bright lighting to minimize noise, while higher settings (e․g․, ISO 6400) are better for dimly lit environments․ You can adjust ISO via the INFO EDIT button or the Shooting Menu․ Always aim to keep ISO as low as possible to reduce noise and maintain sharpness․
5․2 White Balance Settings for Different Lighting
White balance on the Nikon D5000 helps capture accurate colors by adjusting to different lighting conditions․ The camera offers various presets, including Auto, Daylight, Fluorescent, Incandescent, Cloudy, and Shade․ You can also set a custom white balance by selecting a white object in the scene․ To access these settings, go to the Shooting Menu and navigate to White Balance․ Choosing the correct setting ensures natural color rendition and minimizes the need for post-processing adjustments․
5․3 Picture Control and Image Optimization
Picture Control in the Nikon D5000 allows you to customize image settings to suit your creative vision․ The camera offers standard styles like Standard, Vivid, Neutral, Monochrome, Portrait, and Landscape․ Each style adjusts parameters such as sharpening, contrast, and saturation․ You can further fine-tune these settings or create custom Picture Controls․ These adjustments enhance image quality and ensure your photos reflect your artistic intent․ Access Picture Control settings via the Shooting Menu to optimize your images for specific shooting conditions or personal preference․
5․4 Using the Self-Timer and Remote Control
The Nikon D5000’s self-timer allows you to take photos without touching the camera, reducing blur caused by camera shake․ Set the self-timer via the Shooting Menu, choosing from delays of 2, 5, 10, or 20 seconds․ For remote shooting, use the optional ML-L3 Remote Control, which offers wireless shutter release․ This is ideal for group photos or tripod-based shots․ Ensure the remote is within range and aimed at the infrared sensor for reliable operation․ These features enhance stability and convenience for precise image capture․

Advanced Features and Techniques
Explore advanced techniques like bracketing, interval shooting, and time-lapse photography to enhance your creative workflow and capture stunning images with precision and control․
6․1 Bracketing and Interval Shooting
Bracketing allows capturing multiple shots at different exposures to merge later for high-dynamic-range images․ Interval Shooting automates taking photos at set intervals, ideal for time-lapse photography․ Access these modes via the Shooting Menu․ Bracketing is useful for scenes with contrasting lights and darks, while Interval Shooting creates dynamic sequences of changing scenes․ Adjust settings like interval duration and number of shots based on your creative goals․ These features enhance your ability to capture detailed and engaging images with precision and ease․
6․2 Using the Nikon D5000’s Burst Mode
Burst Mode on the Nikon D5000 allows continuous shooting at a high frame rate, capturing up to 4 frames per second․ This feature is ideal for action photography, such as sports or wildlife, where split-second moments are crucial․ Activate Burst Mode by selecting “Continuous” in the camera menu․ The camera will shoot in bursts as long as the shutter button is pressed․ For best results, use a fast memory card and ensure the buffer has space․ This mode enhances your ability to capture dynamic and fleeting moments with precision and speed․
6․3 HDR and Multiple Exposure Shooting
The Nikon D5000 offers HDR (High Dynamic Range) and Multiple Exposure Shooting for creative photography․ HDR combines multiple shots to capture a wider dynamic range, ideal for high-contrast scenes․ Enable HDR in the camera menu and choose Auto or Manual options․ Multiple Exposure Shooting allows capturing up to 3 shots in a single frame․ Select this mode to create unique, layered images․ Use a tripod for stability and experiment with themes like landscapes or portraits․ These features expand your creative possibilities, enhancing your photography with stunning results and artistic expression․
6․4 Time-Lapse Photography
Time-lapse photography captures a sequence of images at set intervals to create a condensed video․ On the Nikon D5000, access this feature via the Shooting menu under Time-Lapse Photography․ Set the interval (up to 9 hours) and the number of shots (up to 1,000)․ Choose a start time and ensure your memory card has enough storage․ Use a tripod for stability․ This mode is ideal for capturing dynamic scenes like sunsets, clouds, or traffic․ Follow on-screen prompts to activate and monitor progress, creating stunning time-lapse videos with ease and precision․

Playback and Editing
The Nikon D5000 offers tools for reviewing and editing images․ Use the Playback button to view photos on the LCD, and access basic editing options like trimming, adjusting exposure, and protecting images․ Organize your shots by deleting unwanted files or creating folders․ These features help manage and enhance your photos efficiently without needing a computer․
7․1 Reviewing Images on the LCD Screen
To review images on the Nikon D5000, press the Playback button․ Use the multi-selector to scroll through photos and the zoom buttons to enlarge or reduce images․ The LCD screen displays key shooting information, including aperture, shutter speed, and ISO․ You can also view histograms to evaluate exposure․ Use the Protect button to mark images as favorites or prevent accidental deletion․ This feature helps you quickly review and organize your photos in the field without needing a computer․
7․2 Basic Image Editing in Camera
The Nikon D5000 allows for basic image editing directly on the camera․ Access the Retouch Menu via the Playback menu to trim images, adjust brightness, and apply filters like Sepia or Monochrome․ Use the D-Lighting option to enhance details in shadows and highlights․ These tools enable quick adjustments without a computer, perfect for refining photos before sharing or further editing; Experiment with settings to achieve desired effects while preserving original files for later processing․
7․3 Deleting and Protecting Images

To manage your photos efficiently, the Nikon D5000 allows you to delete unwanted images or protect them from accidental deletion․ Use the Playback Menu to select and delete individual or multiple images․ For protection, mark photos as Protected, which prevents them from being deleted․ This feature is useful for safeguarding important shots․ Review images carefully before deleting, as this action is permanent․ Protected images remain secure unless intentionally removed using the camera’s menu options․
Menu Navigation and Customization
The Nikon D5000 offers intuitive menu navigation and customization options, allowing users to streamline their workflow by personalizing settings and accessing frequently used features efficiently․
8․1 Navigating the Main Menu
Navigating the main menu on the Nikon D5000 is straightforward․ Press the Menu button to access the menu system․ Use the multi-selector to scroll through options like Shooting, Setup, and Playback․ Highlight desired options and press OK to view sub-menus․ Adjust settings using the multi-selector or command dial․ The main menu is organized into sections, making it easy to locate and modify camera settings to suit your needs․
8․2 Customizing Menu Options
Customizing menu options on the Nikon D5000 allows you to tailor settings to your preferences․ Use the multi-selector to navigate to desired menu items and adjust them using the command dial or multi-selector․ You can personalize shooting modes, autofocus settings, and image optimization features․ Save your custom settings for quick access, ensuring a streamlined workflow․ Regularly review and update your customization to adapt to different shooting scenarios, enhancing your overall photography experience with the Nikon D5000․
8․3 Saving and Resetting Settings
The Nikon D5000 allows you to save customized settings for quick access․ Access the menu, navigate to the desired setting, and select “Save” to store your configurations․ Saved settings are stored on the memory card or in the camera’s internal memory․ To reset settings, go to the “Reset” option in the menu and confirm․ This reverts all settings to factory defaults, useful for troubleshooting or starting fresh․ Regularly saving and resetting settings helps maintain optimal camera performance and organization of your shooting preferences․
Accessories and Maintenance
Explore compatible lenses, flashes, and tripods to enhance your Nikon D5000 experience․ Learn cleaning techniques, storage tips, and maintenance routines to ensure optimal camera performance and longevity․
9․1 Compatible Lenses and Accessories
The Nikon D5000 is compatible with a wide range of Nikon F-mount lenses, including the AF-S DX NIKKOR 18-55mm kit lens․ Additionally, it supports external flashes like the SB-600 and SB-800 Speedlights for enhanced lighting․ Accessories such as tripods, remote controllers, and memory cards can also be used to expand functionality․ Always ensure compatibility with the camera’s specifications for optimal performance․ Using genuine Nikon accessories is recommended to maintain quality and avoid potential issues․
9․2 Cleaning and Maintaining the Camera
Regular cleaning and maintenance are essential to keep the Nikon D5000 in optimal condition․ Use a soft, dry cloth to wipe the camera body and lens․ For the image sensor, use a blower or cleaning brush to remove dust․ Avoid touching the sensor with bare hands․ Clean the mirror with a specialized cleaning kit, and use a blower for the viewfinder․ Store the camera in a dry, cool place to prevent moisture damage․ Avoid using harsh chemicals or compressed air, as they may harm the camera’s components․ Regular maintenance ensures long-term performance and image quality․
9․3 Updating Firmware
Updating the Nikon D5000’s firmware ensures optimal performance and adds new features․ Check Nikon’s official website for the latest firmware version․ Download the update to a memory card using a computer․ Insert the card into the camera and navigate to the firmware update option in the menu․ Follow on-screen instructions to complete the update․ Ensure the battery is fully charged and avoid interrupting the process․ After completion, restart the camera to apply the changes․ Regularly checking for updates keeps your camera up-to-date with the latest enhancements and bug fixes․
Troubleshooting Common Issues
Troubleshooting common issues with the Nikon D5000 involves checking settings, restarting the camera, and consulting the manual․ Ensure proper battery charging and card formatting․ Clean the sensor and lens for clear images․ If problems persist, visit Nikon’s support website for solutions or contact customer service․ Regular maintenance and updates help prevent issues․
10․1 Resolving Error Messages
When error messages appear on the Nikon D5000’s LCD, refer to the manual for specific solutions․ Common errors include memory card issues, lens problems, or sensor cleaning needs․ Turn the camera off and on to reset․ For memory card errors, format the card in-camera․ Lens errors may require cleaning or reattaching the lens properly․ If a “FORC” or ” Err” message appears, gently clean the sensor․ Visit Nikon’s support site for detailed troubleshooting guides or contact customer service for persistent issues․ Always update firmware to resolve software-related errors․
10․2 Dealing with Battery and Memory Card Issues
If the battery drains quickly, ensure it is fully charged and avoid overcharging․ Clean the terminals with a soft cloth; For memory card issues, format the card in-camera or use a card reader․ Avoid using cards with unsupported capacities․ If the camera doesn’t recognize the card, try reinserting it or using a different one․ Low battery warnings can be resolved by charging or replacing the battery․ Always use high-speed memory cards for optimal performance․ Refer to the manual for troubleshooting steps or contact Nikon support for persistent problems․
10․3 Addressing Autofocus and Metering Problems
If the autofocus isn’t functioning properly, ensure the lens is clean and free of debris․ Check that the autofocus mode is set correctly for your subject․ For metering issues, verify that the metering mode matches your scene․ If exposure is inconsistent, use exposure compensation․ Ensure the camera’s firmware is updated, as outdated software can cause performance issues․ If problems persist, reset the camera to its default settings or consult the manual for advanced troubleshooting steps․ Clean the sensor regularly to maintain accuracy in autofocus and metering․
Mastering the Nikon D5000 requires practice and exploration․ Regularly review your work, stay updated with new techniques, and experiment with advanced features․ Keep improving and enjoy capturing stunning images with your Nikon D5000․
11․1 Maximizing the Potential of the Nikon D5000
To fully utilize the Nikon D5000, explore its advanced features like bracketing, HDR, and burst mode for dynamic results․ Experiment with manual controls, RAW format, and custom settings to enhance image quality․ Regular practice and reviewing your photos will refine your skills․ Stay updated with new techniques and Nikon accessories to expand your creative possibilities․ By mastering these elements, you can unlock the full potential of your camera and capture stunning, professional-grade images consistently․
11․2 Continuing to Learn and Improve
Continuous learning is key to mastering the Nikon D5000․ Explore online tutorials, workshops, and video guides to deepen your understanding of advanced techniques․ Join photography communities and forums to share ideas and gain insights․ Regularly practicing and experimenting with different modes and settings will enhance your skills․ Stay updated on new trends and accessories to keep your photography evolving․ Dedication and consistent practice will help you grow as a photographer and make the most of your Nikon D5000․